 I have a bag of prawn shells reserved in the freezer to try out cwl's (a KC member) prawn mee recipe. But I ended out with my version of prawn mee instead (lack of ingredients, using my ready-made chilli paste, etc). I think I put too much fried shallots in my stock that it over power the smell of prawn in the stock. Not really happy with my version and the ingredients I put in. Next time have to make it real authentic with just kangkong, shrimps and thin pork slices instead of spinach and added fish balls. I think too much stuff spoiled this delicate soup base.My hubby seem to like it though since he finished the whole bowl including all the soup!! *Shocking*
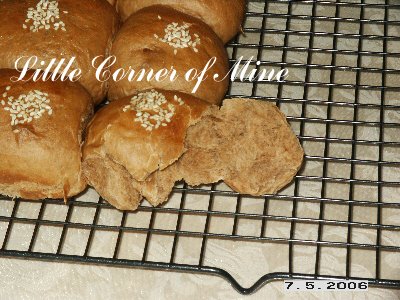
 I'm using the Basic Sweet Buns recipe posted here. The changes I made was adding 2 Tbp. cocoa powder, 1/2 tsp. coffee emulco and 10ml strong instant coffee liquid. I brushed the top with milk and sprinkled with white sesame seeds before baking.
 Soft and satisfying buns with a hint of coffee and chocolate flavors, very nice with my morning cup of coffee.
For Pei:
 Basic Sweet Bun Dough recipe by Gina from Kitchencaper:
2 3/4 cup bread flour
1 cup plain flour
1 tsp. bread improver
1 tsp. salt
1 Tbp. milk powder
1 Tbp. instant yeast
1/2 cup sugar
1 egg
220ml cold water
1 tsp. pandan paste (I added)
1/3 cup butter
1 tsp. bread softener (optional)
Method (My way):
1. Add everything in according to your breadmaker manual. Turn on the dough function and let the breadmaker do the work.
2. When done, take the dough out, give it a few kneads and cut it and shape it whatever you like. For the above bun shape, roll the dough in cylinder shape, cut out individual portion, roll it into ball and place it on a square or circle baking pan lined with parchment paper.
Note: You can add any filling you like at this point as well.
3. When finished placing the balls of dough in the baking pan, leave some space in between for it to prove. Cover with plastic wrap and let it proves for 45-60 mins depending on the temperature of your room (or double in size). It is faster if you let it proves under the sun.
4. When double in size, brush the top with milk or egg wash (sprinkle with sesame seeds if you like) and bake in the preheated 375'F oven for 10-12 mins. Or until golden brown on top. When warm from the oven, brush the top with some honey/maple syrup (like my picture above) to give it some shine.
5. Cool on wire rack and can be kept in the air-tight container and stay soft up to 4 days.
The variety of buns you can make from this is endless, try plain buns, green tea buns, chocolate buns, cinnamon buns, strawberry buns, mixed colors buns, etc.
Happy baking and experimenting!! :)


