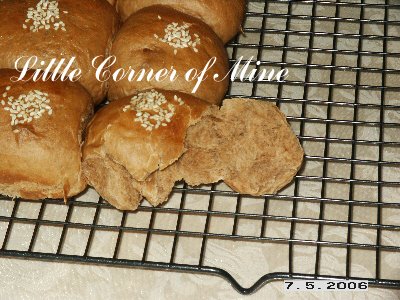
I'm using the Basic Sweet Buns recipe posted here. The changes I made was adding 2 Tbp. cocoa powder, 1/2 tsp. coffee emulco and 10ml strong instant coffee liquid. I brushed the top with milk and sprinkled with white sesame seeds before baking.
 Soft and satisfying buns with a hint of coffee and chocolate flavors, very nice with my morning cup of coffee.
For Pei:
 Basic Sweet Bun Dough recipe by Gina from Kitchencaper:
2 3/4 cup bread flour
1 cup plain flour
1 tsp. bread improver
1 tsp. salt
1 Tbp. milk powder
1 Tbp. instant yeast
1/2 cup sugar
1 egg
220ml cold water
1 tsp. pandan paste (I added)
1/3 cup butter
1 tsp. bread softener (optional)
Method (My way):
1. Add everything in according to your breadmaker manual. Turn on the dough function and let the breadmaker do the work.
2. When done, take the dough out, give it a few kneads and cut it and shape it whatever you like. For the above bun shape, roll the dough in cylinder shape, cut out individual portion, roll it into ball and place it on a square or circle baking pan lined with parchment paper.
Note: You can add any filling you like at this point as well.
3. When finished placing the balls of dough in the baking pan, leave some space in between for it to prove. Cover with plastic wrap and let it proves for 45-60 mins depending on the temperature of your room (or double in size). It is faster if you let it proves under the sun.
4. When double in size, brush the top with milk or egg wash (sprinkle with sesame seeds if you like) and bake in the preheated 375'F oven for 10-12 mins. Or until golden brown on top. When warm from the oven, brush the top with some honey/maple syrup (like my picture above) to give it some shine.
5. Cool on wire rack and can be kept in the air-tight container and stay soft up to 4 days.
The variety of buns you can make from this is endless, try plain buns, green tea buns, chocolate buns, cinnamon buns, strawberry buns, mixed colors buns, etc.
Happy baking and experimenting!! :)
Basic Sweet Bun Dough recipe by Gina from Kitchencaper:
2 3/4 cup bread flour
1 cup plain flour
1 tsp. bread improver
1 tsp. salt
1 Tbp. milk powder
1 Tbp. instant yeast
1/2 cup sugar
1 egg
220ml cold water
1 tsp. pandan paste (I added)
1/3 cup butter
1 tsp. bread softener (optional)
Method (My way):
1. Add everything in according to your breadmaker manual. Turn on the dough function and let the breadmaker do the work.
2. When done, take the dough out, give it a few kneads and cut it and shape it whatever you like. For the above bun shape, roll the dough in cylinder shape, cut out individual portion, roll it into ball and place it on a square or circle baking pan lined with parchment paper.
Note: You can add any filling you like at this point as well.
3. When finished placing the balls of dough in the baking pan, leave some space in between for it to prove. Cover with plastic wrap and let it proves for 45-60 mins depending on the temperature of your room (or double in size). It is faster if you let it proves under the sun.
4. When double in size, brush the top with milk or egg wash (sprinkle with sesame seeds if you like) and bake in the preheated 375'F oven for 10-12 mins. Or until golden brown on top. When warm from the oven, brush the top with some honey/maple syrup (like my picture above) to give it some shine.
5. Cool on wire rack and can be kept in the air-tight container and stay soft up to 4 days.
The variety of buns you can make from this is endless, try plain buns, green tea buns, chocolate buns, cinnamon buns, strawberry buns, mixed colors buns, etc.
Happy baking and experimenting!! :)
What do you do with some leftover wontan noodle in the refrigerator?
We had minced pork wontan noodle with pan-fried dumplings yesterday and guess I cooked too much noodle! So, I was cracking my head as what to do with the noodle with the ingredients I have on hands. This was what I came out with.  Pan-fried wontan noodle with bay scallops and vegetable.Recipe:1. Pan-fried the noodle with some oil until both sides are crispy and golden brown. Dish out and place on a plate.2. Heat up some oil and add garlic, napa cabbage, carrot, mushroom and babycorn (or any veggies you have). Stir-fry until soften. Season to taste with oyster sauce, salt and sugar. Then add water (for the gravy), let it boil. Then add bay scallops (or shrimps), simmer until the scallops are cooked. Then stir in some potato starch mixed with water to thicken the gravy. Pour on top of the pan-fried noodle and serve with chilli padi. Pretty easy huh?
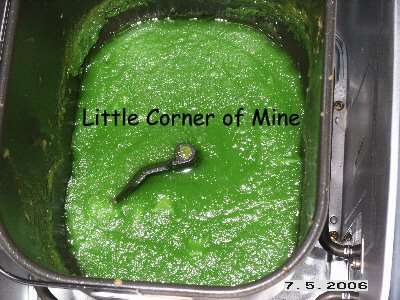
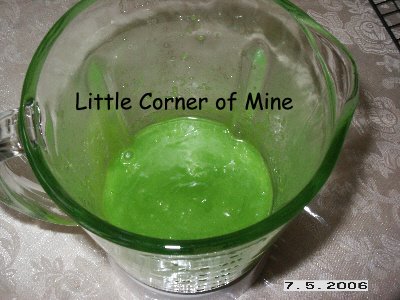
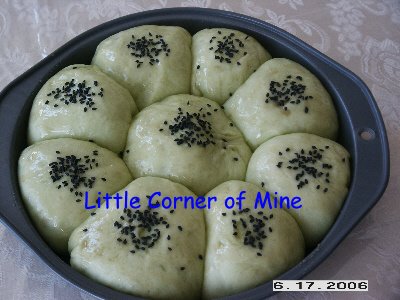
After saying for months that I want to eat Pandan Buns with tau sar filling, I finally took out my breadmaker and made it. Finally got this craving satisfied! Hehe...
I used Gina's basic sweet bread recipe and added pandan paste into the breadmaker and turned on Dough function and let it did the work. Then, I divided the dough into half, one in the freezer it went, the other half, I cut into small balls, put the tau sar filling, closed and shaped like a ball shape. Put in a round baking pan, covered with wrap and let it proof under the sun for 40 mins. Remember to put a parchment paper on the baking pan first, if not the buns will stick.
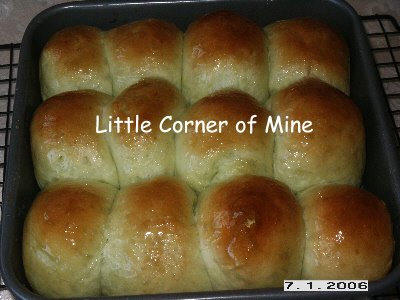
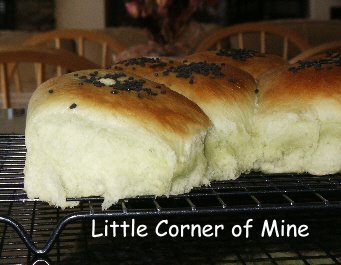
 When prove for 40 mins under the sun. I brushed the top with maple syrup and sprinkled with black sesame seeds. Oh, pardon my middle bun, got an indentation after I tried to pinch it after proofing because I spotted the dough was too thin.
 Tada! Ready in 10 mins on preheated 375'F oven. Yeah, I have no even shaped buns because I was too lazy to measure the weight of each bun to shape it, also it's for our own consumption anyway, why bother with the extra work. :oP
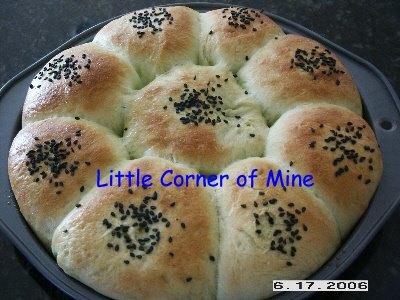
 Hhe buns are really soft (I added bread softener as well), but the green color is not obvious at all. Will have to add more pandan paste next time as I found the flavor not strong too.
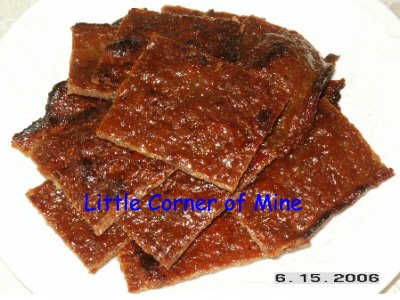 Yeahhh, I finally made Tazz's bak kua. Her recipe can be found here. It took me awhile but glad I did it. I followed the original recipe provided by her blog. I baked mine in a convection oven.
I only made 1/2 pound of ground pork just to test it out. The result was delicious. Even my daughter kept asking for more. Definitely finger licking good and a die die must try recipe. What's more, super easy to make!
Eat it plain or sandwich it in the Hawaiian sweet bun for breakfast or snack, yummy! Will definitely make more the next time, but need to buy parchment paper first, out of it already.
Eve said it can be kept at room temperature up to 3 days in a plastic container. Thanks Eve! :)
Yeahhh, I finally made Tazz's bak kua. Her recipe can be found here. It took me awhile but glad I did it. I followed the original recipe provided by her blog. I baked mine in a convection oven.
I only made 1/2 pound of ground pork just to test it out. The result was delicious. Even my daughter kept asking for more. Definitely finger licking good and a die die must try recipe. What's more, super easy to make!
Eat it plain or sandwich it in the Hawaiian sweet bun for breakfast or snack, yummy! Will definitely make more the next time, but need to buy parchment paper first, out of it already.
Eve said it can be kept at room temperature up to 3 days in a plastic container. Thanks Eve! :)